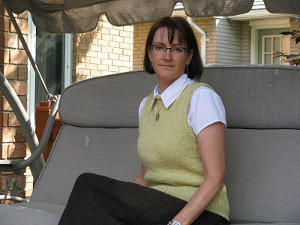
Sheer Summer Fun
This is a light, sheer summer top, with a slight cowl front
drape, and a back with slits and buttons for an interesting detail. I like
simple things that look a bit more difficult.
This pattern is just a bit more than beginner, and the trickiest part is
working with very fine yarn. The effort
is worth it, for a light top that can be worn year round, with a tank in the
summer, and a cardigan or jacket added in the winter.
Sizes: x-small[small,
med, large, x-large} finished
measurements: 34”[36”, 38”, 40”, 43”]
Suggestion, best worn a bit loose, to allow the back to drape at the
cut-outs.
Yarn: Americo Abrazos, (45% Pima Cotton,55% Bamboo) 100 grams skein (940 mts)… 1[1,1,2,2]
skeins. Shown in J239, dark teal.
Needles: 3mm or other to achieve correct gauge
Buttons for back detailing. ( or beads , ribbons, decorative
yarn… your choice)
2 Stitch markers.
Gauge: 30 sts = 4 “ on 3mm needles* intentionally knit on larger than suggested
needle to make a bit more of a lace effect. Only knitting a swatch and checking
the gauge will assure a proper fit.
Please take the time to do this.
BACK:
Cast on 128[136, 144, 150, 162]. Work in stocking stitch for
6 inches.
Back detail Row 1:
With right side facing, knit 20,
cast off 88[96, 104, 110, 122] . Knit last 20 sts.
Row 2: Purl 20. Turn
and cast on 88[96, 104, 110, 122]. Purl
last 20 sts.
Work in stocking stitch for 5 more inches (total measurement
is 11 inches.).
Repeat Back detail rows 1 and 2.
Continue to work even until total measurement is 15”[16, 16,
17, 18]” .
Armhole shaping: Cast off 7 sts at the start of next 2 rows.
Work even in stocking stitch until total length is 16
inches.
Upper Back Detail Row 1:
Right side: Knit 15, cast off 84[92, 100, 106, 118] , knit 15.
Row 2: purl 15, cast on 84[92, 100, 106, 118], purl 15.
Continue to work in stocking stitch until total length is
25”[26, 26, 27, 28]”. Cast off all
stitches.
FRONT:
Work same as back until armhole shaping is done. 114[122,
130, 136, 148] stitches on your needle.
Next row: Knit 56[60,
64, 67, 73], place marker, knit2, place marker, knit 56[60, 64, 67, 73]
Wrong side rows for rest of front: purl all stitches.
Increase row (right side):
knit to first marker, slip
marker, increase in next stitch (I knit in the front and back to increase),
work to stitch BEFORE next marker, increase in this stitch. Slip marker and knit to end of row.
Work this increase row every right side, until you have 38
stitches between the markers. Then work
even until your total length of the front is the same as the back. Cast off all stitches.
Your extra front stitches will create a bit of a cowl
neckline.
Finish by carefully sewing two shoulder seams about 5 inches
starting at the shoulder. Sew side
seams. Allow the arm edges , neck edges
and bottom edge to curl organically.
Back opening details:
I joined the slits at three spots with Abrazos yarn and buttons. You could use beads, or decorative yarn or
thread. You could close more or less,
OR you could ignore the slits completely and knit the back
without the cast off rows and make a lovely simple shell. (I won’t be offended!)


